Working with storyboards
You can create and edit storyboards to create a video project that is comprised of multiple, shorter video clips.
Storyboards are saved with the current media library.
When no library is opened, storyboard support is not available. For more information, see "Creating or opening a library."
If you need to create a project that can be written back to a camera or device, you can create a PD-EDL clip list. For more information, see "Working with clip lists."
Creating a storyboard
-
Click the Organize button at the top of the Catalyst Prepare window.
-
Navigate to the folder that contains the clips you want to use.
-
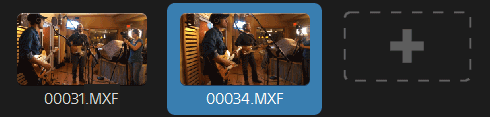
Select the files you want to include in your clip list. You can hold Shift or Control (Windows) / ⌘ (macOS) to select multiple files.
-
Click the Storyboard button
 at the bottom of the Catalyst Prepare window and choose Create from selection from the menu.
The Create from selection command is not available when a clip list, spanned clip (
 ), or an FTP-based clip is selected.
If you want create a storyboard list without choosing clips, click the Storyboard button at the bottom of the Catalyst Prepare window and choose Create empty from the menu.
-
Type a name for the storyboard and click OK.
Opening a storyboard
-
Click the Organize button at the top of the Catalyst Prepare window.
-
Click a storyboard in the Storyboards section of the left pane. The storyboard's clips are displayed in the center pane.
-
Click the Edit button to load your storyboard in Edit mode.
When viewing a storyboard,
indicates spanned clips from the same volume, and  indicates spanned clips from different volumes.
Rearranging clips
In Edit mode, you can add, remove, and arrange clips.
You can drag clips within the storyboard to rearrange them. Drag a clip and drop it to a new position to move it.
Adding clips
-
Click the Organize button at the top of the Catalyst Prepare window.
-
Click a storyboard in the Storyboards section of the left pane. The storyboard's clips are displayed in the center pane.
When the Add To button at the bottom of the Catalyst Prepare window is selected, you can quickly add a clip to the selected storyboard by selecting it and clicking the Add button (or pressing Enter). Use the Add clip to storyboard drop-down list to select a storyboard.
When you add a clip, a vertical line is added to the timeline to indicate where each clip begins:

You can also drag clips from the Organize pane to a bin or storyboard in the Places pane.
-
Click the Edit button to load your storyboard in Edit mode.
-
Click the add button at the end of the clip list or the Add button at the bottom of the Catalyst Prepare window to display a media browser, where you can select additional clips for your storyboard.
Removing clips
-
Click the Organize button at the top of the Catalyst Prepare window.
-
Click a storyboard in the Storyboards section of the left pane. The storyboard's clips are displayed in the center pane.
-
Click the Edit button to load your storyboard in Edit mode.
Select a clip and click the Remove button  at the bottom of the Catalyst Prepare window.
Editing clips
In Clip mode, you can log mark in and out points for your clips.
You cannot add, delete, or rearrange clips in Clip or Adjust Color mode. Use Storyboard mode for clip list editing.
-
Click the Organize button at the top of the Catalyst Prepare window.
-
Click a storyboard in the Storyboards section of the left pane. The storyboard's clips are displayed in the center pane.
-
Click the Edit button to load your storyboard in Edit mode.
-
Click the Clip button at the bottom of the Catalyst Prepare window to switch to Clip mode.
You can also double-click a clip in Storyboard mode to switch to Clip mode.
-
Select the clip you want to edit.
-
Use the Mark In and Mark Out buttons to adjust the mark in and out points for the selected clip.
For more information, see "Marking in and out points for playback."
Editing a storyboard clip's mark in and out points does not affect other storyboards that use the same clip.
Adjusting color correction for clips
In Adjust Color mode, you can adjust color correction settings for each clip in a storyboard.
You cannot add, delete, or rearrange clips in Clip or Adjust Color mode. Use Storyboard mode for clip list editing.
-
Click the Organize button at the top of the Catalyst Prepare window.
-
Click a storyboard in the Storyboards section of the left pane. The storyboard's clips are displayed in the center pane.
-
Click the Edit button to load your storyboard in Edit mode.
-
Click the Adjust Color button at the bottom of the Catalyst Prepare window to switch to Adjust Color mode. In this mode, Catalyst Prepare displays a waveform/histogram/vectorscope monitor, a video preview, and color controls that you can use to adjust the appearance of your video.
-
Select the clip you want to edit.
-
Click the Inspector button
 in the toolbar to display the Inspector pane if it isn't already visible. In the Adjust Color workspace, the Inspector pane provides controls that you will use to adjust color-grading settings.
The waveform/histogram/vectorscope monitor and video preview window allow you to monitor your progress as you adjust color values. For more information, see "Editing Color Adjustments controls."
Previewing storyboards
When you double-click a storyboard in Organize mode, the storyboard is loaded in Edit mode, where you can preview the file in the same way you preview other clips. For more information, see "Previewing video."
You can select a clip to set the starting point for playback, and the clip selection will follow the cursor during playback.
Exporting storyboards
When you select a storyboard in Organize mode, you can export the storyboard in one of three ways:
-
You can render each of the storyboard's clips to a new format.
-
You can render the storyboard as a single media file.
-
You can export the storyboard as a project for use in another video editor.
For more information, see "Exporting media from a library," "Exporting media from a library," or "Exporting media from a library."
Using Catalyst Prepare storyboards in Catalyst Edit
Catalyst Edit provides native support for Catalyst Prepare storyboards:
-
In the Catalyst Edit Media Browser, double-click a .cpreplib file (
 ). When you open a Catalyst Prepare library, the Media Browser displays all the media contained in that library sorted in bins.
 The default location for .cpreplib files is C:\Users\<username>\Videos\ on Windows and /Users/<username>/Movies/ on macOS.
-
Drag a storyboard bin to the Catalyst Edit timeline to add it.
Viewing metadata for storyboards
Click the Inspector button in the toolbar to display metadata in the Inspector pane. The Inspector pane displays information about the selected subclip.
For more information, see "Viewing and editing metadata."
Renaming a storyboard
-
Click the Organize button at the top of the Catalyst Prepare window.
-
Click a storyboard in the Storyboards section of the left pane. The storyboard's clips are displayed in the center pane.
-
Click the Storyboard button
at the bottom of the Catalyst Prepare window and choose Rename from the menu. -
Type a name for the storyboard and click OK.
Deleting a storyboard
-
Click the Organize button at the top of the Catalyst Prepare window.
-
Click a storyboard in the Storyboards section of the left pane. The storyboard's clips are displayed in the center pane.
-
Click the Storyboard button
at the bottom of the Catalyst Prepare window and choose Delete from the menu.